Roast Turkey in Cast Iron

YouTube: Roast Turkey in Cast Iron: 2018
Brining the Bird
Wet Brine


I like the results of a wet brine, as it keeps the meat moist and juicy; also a wet brine takes only one day as opposed to two to three days for a dry brine. For this recipe, I'd like to recommend using a buttermilk brine…or, to be more accurate, a curdled milk brine! After all, buttermilk is the best way to soak chicken in preparation for making fried chicken. If it's good enough for fried chicken, it's certainly good enough for roast turkey.
Be sure the turkey is thawed out two days before serving. This will give you plenty of time to brine the bird. Prepare your brine:
- 1 gallon whole milk
- 1 cup apple cider vinegar
- If you're using a gallon of buttermilk rather than whole milk, you don't need the vinegar.
- 1/3 cup kosher salt
- 2 tablespoons sage
- 2 tablespoons thyme
- 2 tablespoons rosemary
- 1 tablespoon ground pepper
- 5-pound bag of ice, to keep the cooler at a low temperature as the turkey brines
The good part about this brine is it doesn't have to be boiled in advance!
It can be expensive to purchase a whole gallon (four quarts) of buttermilk. A much less expensive solution is as follows: in a container over one gallon in size, such as a large bowl or plastic container, add one gallon of whole milk. Stir in 1 cup apple cider vinegar. Wait 15 to 20 minutes for the milk to curdle and take on the consistency of buttermilk. Stir in salt, sage, thyme, rosemary, pepper. The brine is ready to be used.
Remove giblets and neck from the cavity. Place the giblets into a plastic container or Ziploc bag, and store them in the refrigerator until the turkey is cooked. The giblets will be used for making gravy.
Rinse the outside and inside the turkey. Add the brine solution to a container bigger than the bird, such as an ice chest, cooler, or even a plastic storage bin. Submerge the turkey in the brine, and cover with a lid. The container must be kept at a temperature lower than 40 degrees F for the brining. (One option is to use a brining bag: add the turkey and brine to the bag, tie the bag closed, and place the bag in a container packed in ice.)
Allow the turkey to marinate for a minimum of 12 hours for a small turkey (8-10 lbs) and at least a full day for a bigger bird. Longer brining time is okay; I used this recipe to brine a 7-pound chicken for over 24 hours before cooking, and it still turned out juicy and delicious. Be sure to rinse the turkey and pat it dry before adding additional seasoning for roasting.
Dry Brine

Instead of using a wet brine of buttermilk, water, or any other liquid, another popular way to prepare a turkey is using a dry brine. Rather than soaking the turkey in a brine for a day or more, this method is to coat the entire turkey in salt, and let it rest in the refrigerator uncovered for 24 hours or more. This method uses osmosis to tenderize the turkey. The salt coating causes the meat to release a lot of liquid, then absorb some of that liquid back in, resulting in a tender and moist turkey when cooked to the right temperature.
- 3 tablespoons kosher salt
- 1/2 tablespoon ground black pepper
- 1 teaspoon smoked paprika
In a small bowl, simply mix together a combination of mostly kosher salt, plus some ground black pepper and smoked paprika. Use kosher salt rather than table salt, because smaller grains of salt will be dissolved and more easily absorbed into the meat.
Prepare a platter, tray or plate for the turkey, and place a trivet or rack onto the tray so the turkey will be above the surface of the tray.
After thawing the turkey, remove the giblets. Pat the bird dry with paper towels. Try to dry off as much of the skin as possible, including the top and bottom, and inside the cavity. Coat the entire turkey with the salt brine mix, rubbing the mix onto the skin on the top and bottom, and also inside the cavity. Place the turkey onto the tray, and place the turkey on the tray into the refrigerator, uncovered. Leave the turkey uncovered and let it rest for 24 hours.
After 24 hours the outside of the turkey will look brown and discolored, but it isn't spoiled – as long as the turkey has been kept inside the refrigerator at a temperature less than 40 degrees Fahrenheit. At this point, wipe the remaining dry brine off of the turkey, and apply your rub or herb butter to roast the turkey.
The Roasting
Place the cast iron pan into the oven before heating. Do not grease the pan in advance; simply place it into the cold oven, dry. Preheat the oven, and the pan, to 450 degrees Fahrenheit. It's okay if the oven reaches 450 degrees before you're finished preparing the turkey rub; you can just leave the pan in the oven until you're ready to place the turkey into it.
While the pan is heating up, prepare an herb butter to apply to the turkey. This simply consists of:
- 1/2 cup (1 stick, 4 ounces) softened butter
- 1/2 teaspoon ground sage
- 1/2 teaspoon ground rosemary
- 1/2 teaspoon ground thyme
- 1/2 teaspoon salt
- 1/2 teaspoon paprika (or smoked paprika)
Crush the spices with a mortar and pestle, or a spice grinder. Soften the butter by running it in a microwave oven for 20 seconds. With a spoon, mix the ground spices in with the butter.
Remove the turkey from the brine, and discard the brine mixture. Place the turkey onto a poultry cutting board or in a large basin.Dry off the turkey with cloth or paper towels, including the inner cavity. It doesn't have to be bone-dry, but at least so it won't soak your hands when you lift and move the bird. There will still be pieces of herb residue from the brine on the surface of the turkey. That's perfectly fine, as it won't affect the finished turkey. Place the turkey onto a poultry cutting board or in a large basin. Fold the wings back and underneath the turkey. Don't tie the legs together yet.


Using your hands, press your fingers underneath the skin of the turkey behind either the left or right breast, starting at the cavity at the back of the turkey. Push your hands inside and underneath the skin, moving towards the front of the turkey. Separate the skin around the breast, up to the spine of the turkey and down towards the thigh. Don't separate the skin at the spine itself. When you've separated enough of the skin, pull your hand out and insert it under the skin on the other side. Separate the skin under the other breast, so the skin is largely separated on both sides; but the skin is still attached to the spine of the turkey.
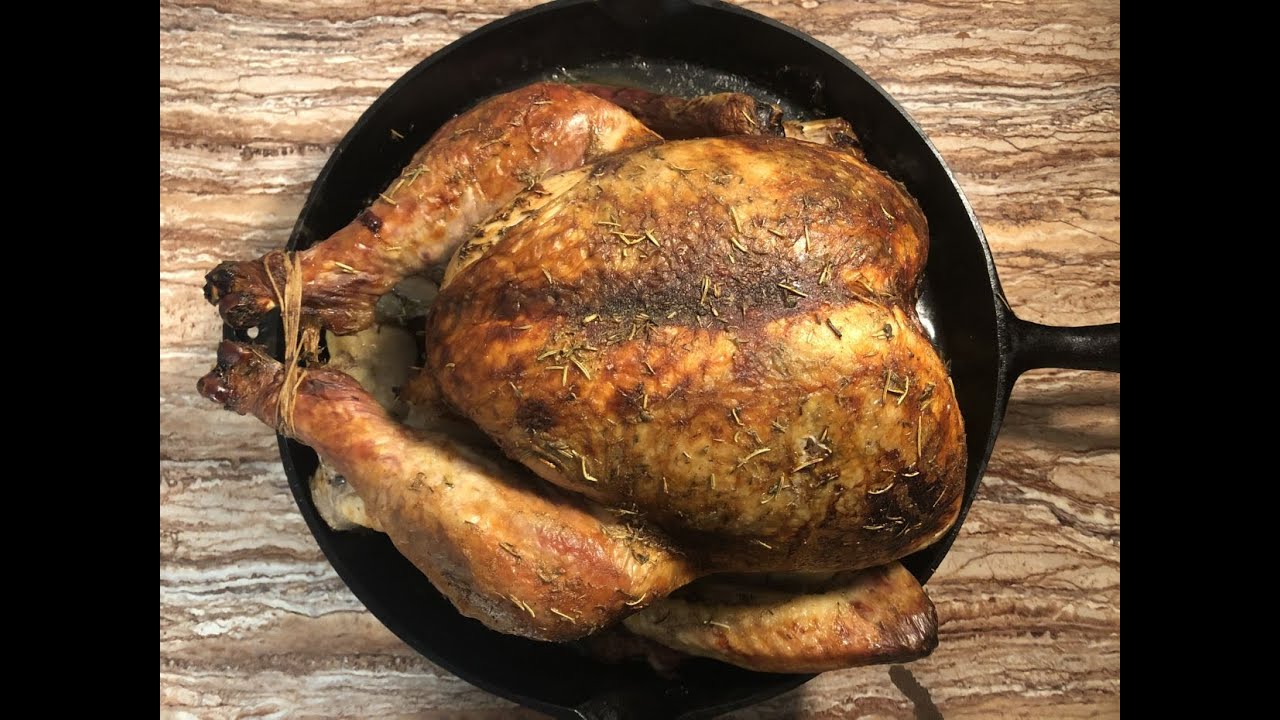
Using your hands, rub the herb butter underneath the skin of both sides of the turkey, the right and left breasts. Push about half or more of the butter underneath the skin. After this, rub the rest of the herb butter over the entire top part of the turkey, all over the top side of the turkey and also over the legs and sides. Be sure to cover just about every bit of exposed skin on the outside of the turkey. You don't have to rub the herb butter on the underside of the turkey, because this part will be resting in the juices as the turkey cooks.
Use a piece of string or twine to tie the turkey legs together.
Do not stuff the turkey! Stuffing it with stuffing will prevent the inside of the turkey from cooking thoroughly, as a mass of heavy stuffing at the center will make it much more difficult to conduct heat to the inside of the bird. This turkey cooked much faster than expected, and given the fast roasting time there is a possibility bacteria in the stuffing could survive at the center without being killed by the oven heat. You can always prepare your stuffing separately, and stuff the turkey after it's completely finished roasting.
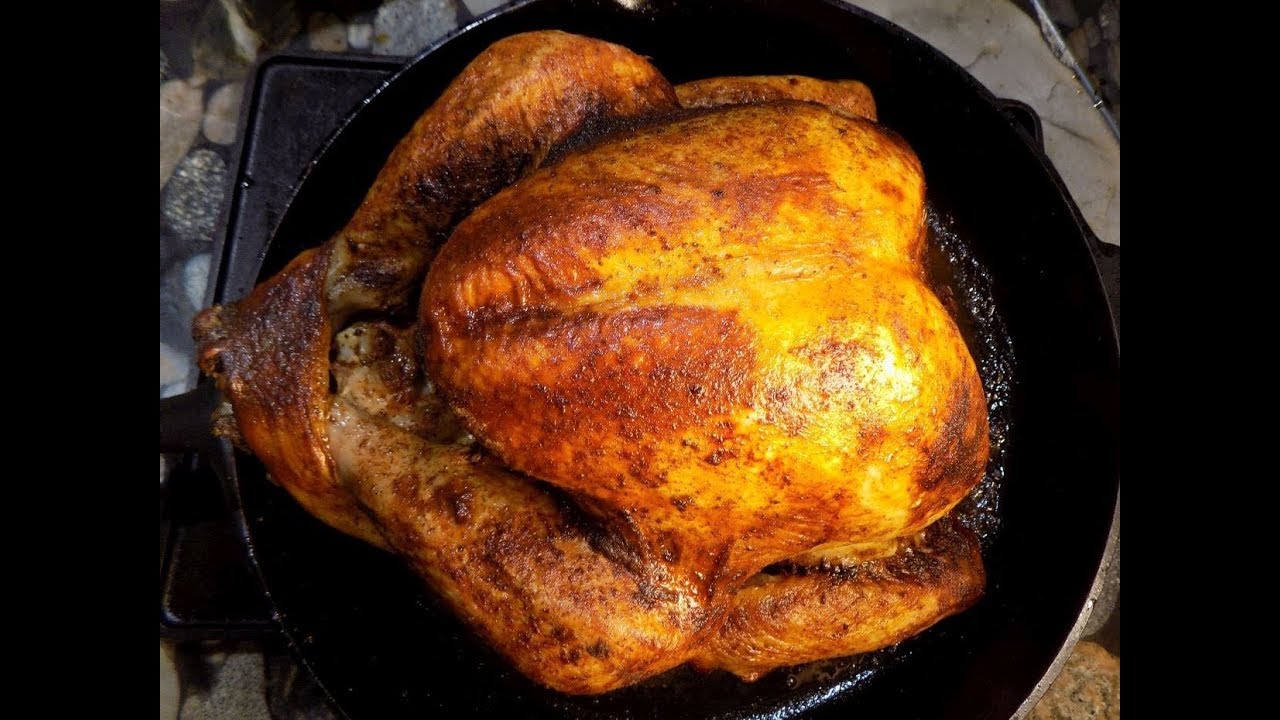
When the oven reaches 450 degrees Fahrenheit and the turkey is coated with the herb butter, use heavy gloves and carefully remove the hot cast iron pan from the oven. Place it onto your stovetop, or onto a large trivet. Place the turkey into the hot pan. It will sizzle when it touches the hot metal! At this point, you can also place the giblets into the hot pan, all around the turkey.
Insert an oven thermometer or probe thermometer into the breast – not the midsection, but the breast. (The heavy cast iron will help with cooking the underside and dark meat of the turkey, so we only need to monitor the temperature of the breast.) Using the heavy gloves, place the pan and turkey into the oven. Immediately lower the oven temperature to 275 degrees Fahrenheit. The oven temperature will decrease as the turkey cooks.
Set the probe thermometer to alarm when the breast temperature reaches 140 degrees Fahrenheit. The low temperature is intentional: when the turkey reaches this temperature, we'll be giving the turkey a blast of 425 degree heat at the end, which will also raise the temperature of the bird.
.jpg)
This turkey does not require basting – once it goes into the oven, you don't have to do a thing until it's time to remove it from the oven.
Depending on your oven, it can take between three to four hours to fully cook the turkey, from the initial roasting to the final blast of heat at the end. It may take somewhat longer than that, depending on the size of the bird.
When the breast temperature reaches 140 degrees Fahrenheit, 15 degrees before it is finished, don't remove the turkey from the oven – because we're not finished yet! Turn the oven temperature up to 425 degrees Fahrenheit, and set your oven thermometer to alarm when the temperature reaches 155 degrees Fahrenheit. This increased temperature will help to brown and crisp the skin during the final cooking time.
When the breast temperature reaches 155 degrees Fahrenheit, remove the entire pan and the turkey from the oven. (Remove the probe themometer!) Move the turkey to a serving platter. Cover the turkey with a foil tent, to allow it to continue cooking internally. While the turkey is resting on your table or stovetop, carryover cooking will raise the internal temperature from 5 to 10 degrees. You can now prepare gravy. Assign a kitchen volunteer to stuff the turkey while the gravy is being prepared.

Don't Forget the Gravy
This method of cooking the turkey produces a lot of pan juices! After the turkey has been removed from the cast iron pan, drain the pan juices into a large heat-safe bowl, so we can use them to prepare the gravy. At this point, the giblets can be discarded.
For the gravy we will need:
- The deglazed fond from the cast iron pan (see below)
- At least 1 cup turkey drippings
- 1/4 cup (4 tablespoons) flour
- Ground black pepper
Prepare the gravy while the finished turkey is standing before being served.
Here's one of the best reasons to use a cast iron pan rather than one of those useless aluminum foil turkey roasters: you can use the same pan to prepare the gravy, without wasting those precious juices and scrapings! The steps for preparing a good gravy are simple:
- Make the roux as thick as possible.
- Add the pan juices to the roux and stir it, to thin it out into gravy.
- Add broth and stir, again and again and again, until the gravy is at the right consistency.
After the turkey has been removed from the pot, move the turkey to a serving platter and stuff it. While the turkey is resting, place the cast iron pan onto your stovetop, and turn the stovetop heat up to medium. (This may require two stovetop burners if the pan is especially large.) Now add about 1/2 cup of the pan juices back into the pan. Using a metal whisk or a fork, deglaze the pan: scrape off all of the cooked-on bits and scrapings from the bottom of the pan, and stir them around until they've all been scraped off and are loose. Add 1/4 cup (four tablespoons of flour) to the pan drippings. Use a whisk to mix it all together into a roux. Add more flour, a little at a time, and keep stirring. The roux will become very thick, and it will become a mass of lumps and pieces of thick flour-broth mixture. This is correct: the roux must be this thick, so it can then be thinned out into a gravy without lumps!
At this point, add some ground black pepper to the roux, and stir it for a few minutes to cook the roux. This will prevent the gravy from having a pasty, floury taste.

From the bowl full of juices, add 1/2 cup of the juices to the cast iron pan. Stir it all around at medium-low heat and mix it all together. The roux will begin to change from lumps into thick goo. Add more juices, and keep stirring.

Add more juices and keep stirring, again and again and again. Keep on adding liquid and stirring, until it becomes a good, thick gravy. Add salt and pepper to taste, and mix in. (You can add other spices to the gravy, but that would change the taste of the gravy to something other than turkey!) You can use a turkey baster to move the gravy into a gravy boat, or carefully pour it out of the pan into the serving vessel.

Serve the hot gravy along with your turkey.
